When “Paper Jam” appears on the operator panel, one or more sheets of print media are jammed in the printer. The diagram and table below illustrate possible jam locations. Refer to the error code next to the display message to help determine the location of the jam. If one sheet is removed and there are more sheets in the printer, the initial message will go away temporarily, then “Paper Jam” will appear again.
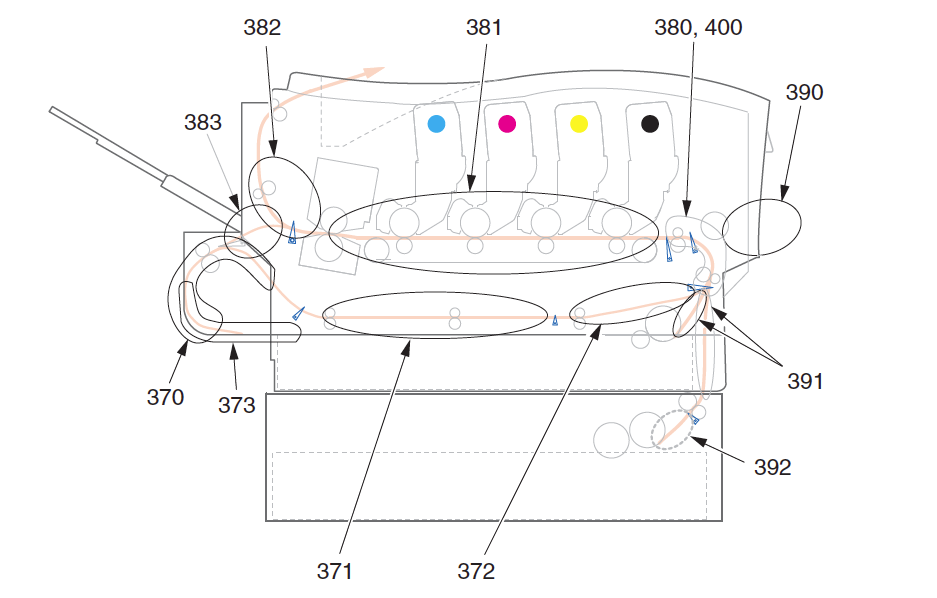
| Code | Jam Location | Code | Jam Location/Problem |
| 370 | Duplex unit | 382 | Paper exit |
| 371 | 383 | Duplex unit | |
| 372 | 390 | Multi-purpose tray | |
| 373 | 391 | Paper tray | |
| 380 | Paper feed | 392 | Second paper tray |
| 381 | Paper path | 400 | Paper size |
1. Make sure you have a sheet of paper on which to place the toner cartridge/image drum.
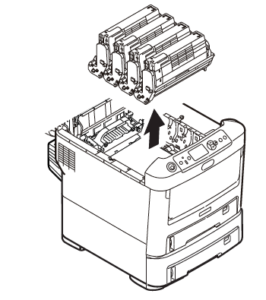
2. Open the top cover.
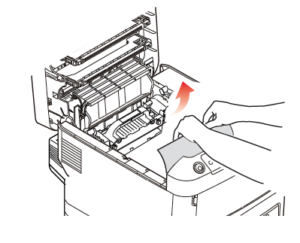
3. If a sheet is advanced out of the top of the printer, gently pull the paper out.

CAUTION: The fuser becomes extremely hot during normal operation. Do not touch it. The surface of the green image area of the drum is delicate and light sensitive. Do not touch it, and do not expose it to normal room light for more than 5 minutes. If the drum needs to be out of the printer for more than 5 minutes, wrap the drum inside a black plastic bag to protect it from light. Never expose the drum to direct sunlight or bright room lighting.
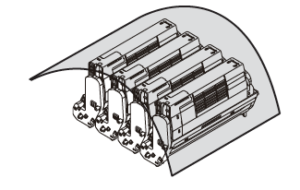
4. Remove all of the toner cartridge/image drums, and place them on a sheet of paper.
5. Cover the toner cartridge/image drums to protect them from light.
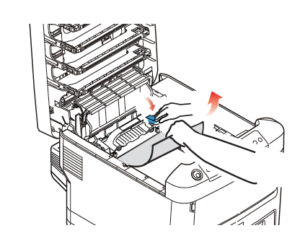
6. Carefully remove any jammed paper.
7. To remove a sheet just entering the fuser: a. Separate the trailing edge of the sheet from the belt. b. Move the paper release lever for the fuser toward the front, and remove the sheet. c. Release the lever.
8. If the sheet is well advanced into the fuser: a. Move both fuser release levers toward the front of the printer to release the fuser. b. Hold the fuser by the handle and lift it out of the printer. If the fuser is still warm, place it on a flat surface that will not be damaged by heat. c. Move the paper release lever and pull the jammed paper from the fuser. d. Replace the fuser unit and move the fuser release levers toward the rear of the printer.

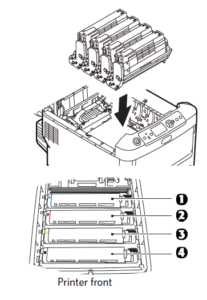
9. Replace the toner cartridge/image drums. Make sure to install them in the proper sequence: 1—Cyan 2—Magenta 3—Yellow 4—Black
10. Close the top cover.
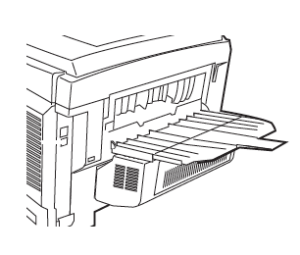
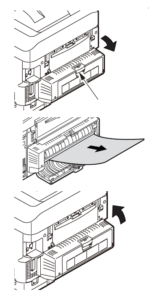
11. Open the rear exit tray and pull out any paper.
12. Close the rear exit tray.
13. If there is paper jammed in the duplex unit: a. Open the cover for the duplex unit and remove any paper. b. Close the cover for the duplex unit.
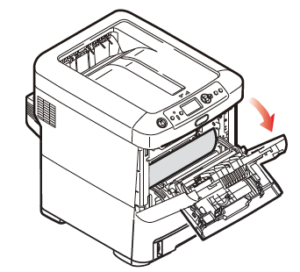
14. Open the front door to access the release lever for the front cover.
15. Lift the release lever and open the front cover.
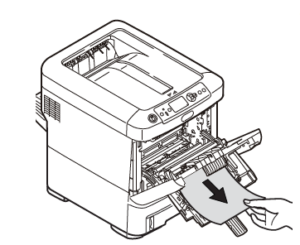
16. Remove any jammed paper.
17. Close the front cover.
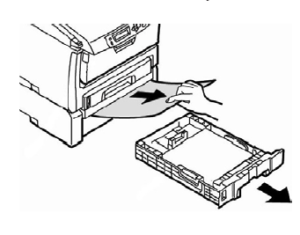
18. Pull out the paper tray and remove any jammed paper.
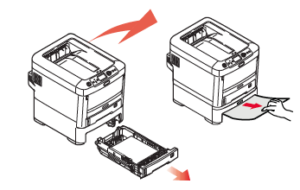
19. Insert the tray.

20. If there is paper jammed in the second paper tray: a. Pull out the second paper tray and remove any jammed paper. b. Insert the tray.